Process AR Payments manually or by Batch for cash / cheque / credit card / debit card payment, or by Batch for Electronic Funds Transfer (EFT)

- Manual Payment entry

-
 flag the transaction(s) being paid
- click on the
 Payment icon
-
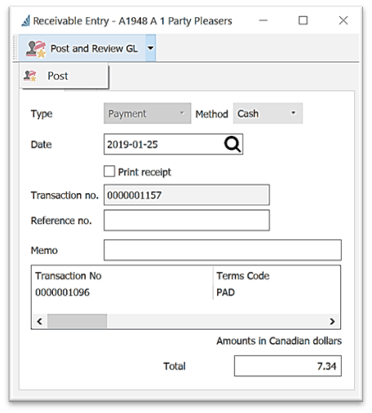
- accept or change the Method of payment
- accept or change the Date
- option to
 Print receipt for the Customer
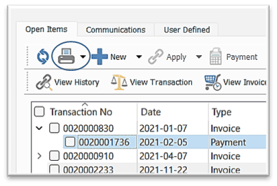
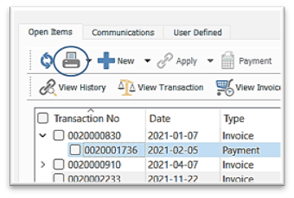
- to re-print this receipt, open the AR account, select the Payment transaction(s) and click
 Print to access the AR Payment Receipt
- to re-print this receipt, open the AR account, select the Payment transaction(s) and click
-
- option to enter a Reference No (typically used for the Customer’s cheque number)
-
- option to enter a Memo for internal reference
- option to enter / change the Discount Amount or Discount % then check
 Give Discount
 - accept or change the Total cheque amount - if changed, shortage will be applied to last transaction, unless the Pay Amount is changed for each transaction
- select from
 Post or
  Post and Review GL (or Alt+s)
- User Settings for this selection - Edit > User Settings > Accounts Receivable:
 Modify GL Transaction
- Modify Transactions by Default:
- User Settings for this selection - Edit > User Settings > Accounts Receivable:
 Batch Payment for Cash / Cheque / Credit / Debit payments
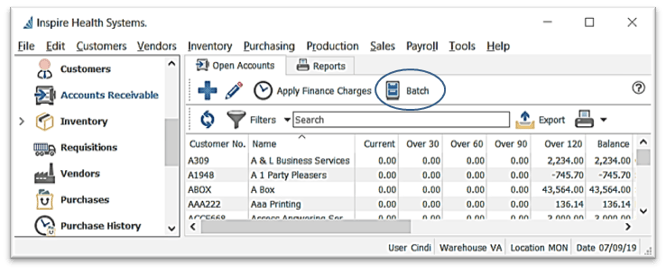
- from the Accounts Receivable list click
 Batch
Batch
- from the Accounts Receivable list click
-
- in AR Batches List click
 Add Batch
- in AR Batches List click

-
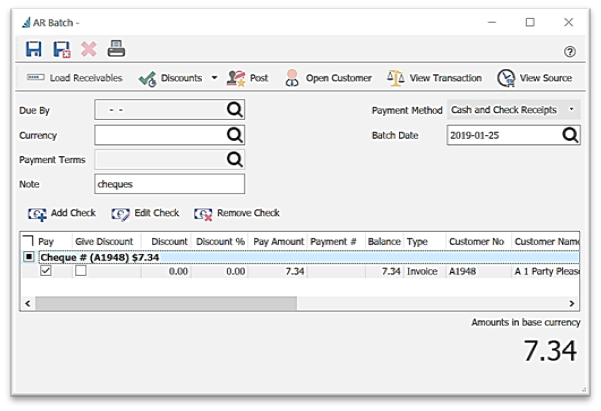
- select the Payment Method
-
- enter or select the Batch Date
- enter any Notes you want to assign to this batch
- click
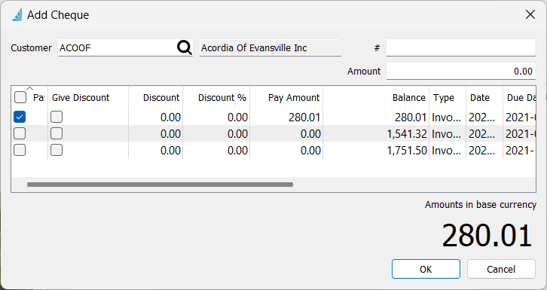
 Add Cheque
-
-
- select Customer
- option to enter Payment #
- enter cheque Amount
 check invoices that are being paid
- option to check Give Discount then assign by amount or %
- Amounts will show accumulated amount of items checked, which should match the cheque amount
-
-
-
- click OK to add this cheque to the AR Batch list
-
-
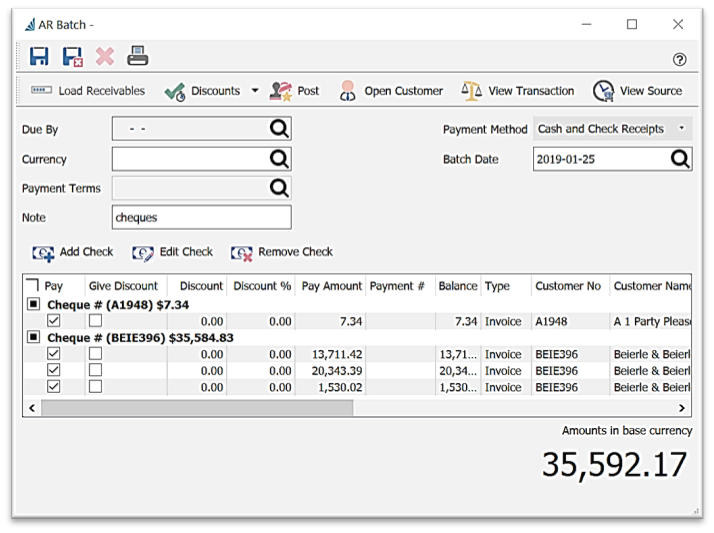
- AR Batch list options:
-
-
- select
 Discount options:
- select
-
-
-
-
- Give Expired Discounts
- Give Available Discounts
- Don’t Give Discounts
 Open Customer to view or edit
 View Transaction selected
 View Source (invoice) for transaction selected
 Add /
Add /  Edit /
  Remove Cheque(s) selected
 Save or
  Save and close to access the AR Batch later
 Delete the AR Batch if you want to start over
 Print / Preview / Email the Pending Receipts report if desired
 Post (or Alt+s) the AR Batch to process payments into each AR account
- you will be prompted to Select EFT Settings
-
-

-
-
-
- confirm or change the GL Account you want to post this batch to
- select from that GL Account's established EFT Settings
- confirm or change the Process on date for the bank transaction
- you will then be prompted to Print / Preview / Email the AR Payment Receipt report - will print each Customer’s payment receipt on a separate page
- to re-print this receipt, open the AR account, select the Payment transaction(s) and click Print to access the AR Payment Receipt
-
-
-
-
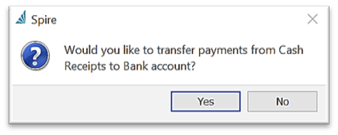
- a prompt will popup with option to transfer payments from Cash Receipts GL Account to Bank GL Account
-
-
-
-
- Yes
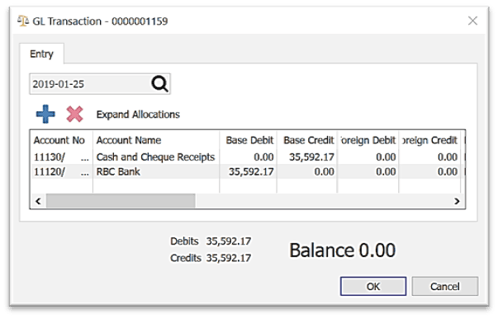
- a transaction will be presented to transfer the total payment amounts from the Cash and Cheque Receipts GL Account to the Bank GL Account
- Yes
-
-
-
-
-
-
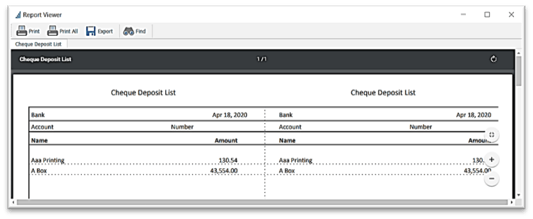
- you will then be prompted to print the Cheque Deposit List which can be used as your deposit slip to the bank
-
-
-
-
-
-
- No - you can manually create the transaction later
-
-
-
-
-
 Batch Payment entry for EFT (Electronic Funds Transfer)
- Setup
- in the GL Account(s) used for payments, click into the EFT Settings tab
-
 select from the EFT format drop-down
 - establish settings from Bank
-
- in the GL Account(s) used for payments, click into the EFT Settings tab
- Setup
-
-

-
-
-
-
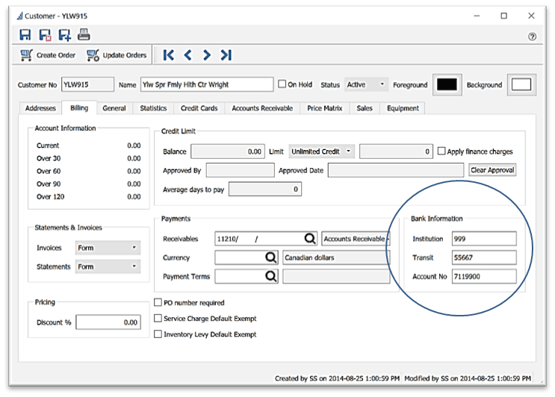
- enter your Customer’s bank information in Customer > Billing tab > Bank Information
-
-
-
-
-
-
- from the Accounts Receivable list click
 Batch
Batch
- from the Accounts Receivable list click
-
-

-
-
-
- in AR Batches List click
 Add Batch
- in AR Batches List click
-
-

-
-
-
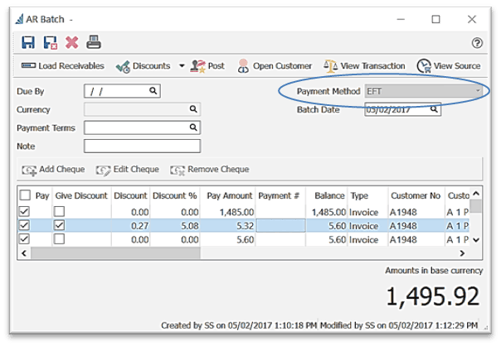
- select EFT Payment Method
-
-
-
-
-
- enter or select the Batch Date
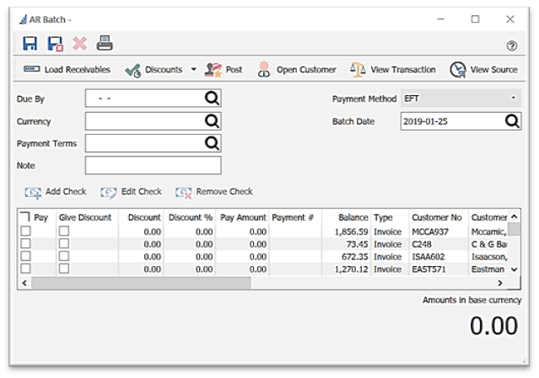
- enter Due By date to load all invoices that are due by this date, or leave blank to load all
- select the Currency of the receivable invoices you want to load, or leave blank for base currency
- select the Payment Terms of the invoices you want to load (ie: EFT - Electronic Funds Transfer)
- enter any Notes you want to assign to this batch
- click
 Load Receivables
 - from the AR Batch list:
-
-
-
-
-
-
- set
 Discount settings
  Open Customer to view or edit
 View Transaction selected
 View Source (invoice) for transaction selected
- set
 Save or
  Save and close to access the AR Batch later
 Delete the AR Batch if you want to start over
 Print the Pending Receipts report if desired
 Post (or Alt+s) the AR Batch to process payments into each account
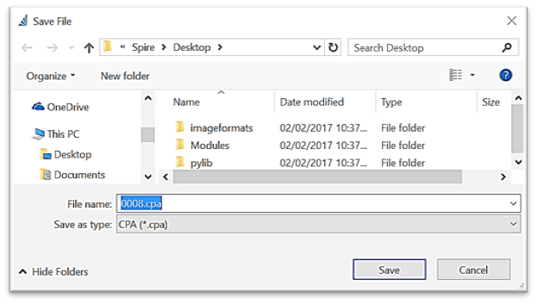
- you will be prompted to Save the file for your bank
-
-
-
-
-
-
-
- you will then be prompted to print / preview / email the AR Payment Receipt report - will print each Customer’s payment receipt on a separate page
- to re-print this receipt, open the AR account, select the Payment transaction(s) and click Print to access the AR Payment Receipt
- you will then be prompted to print / preview / email the AR Payment Receipt report - will print each Customer’s payment receipt on a separate page
-
-
-

-
-
-
-
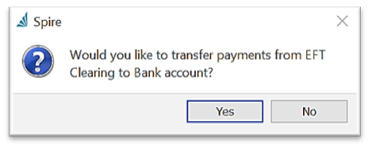
- a prompt will popup with option to transfer payments from EFT GL Account to Bank GL Account
-
-
-
-
-
-
-
-
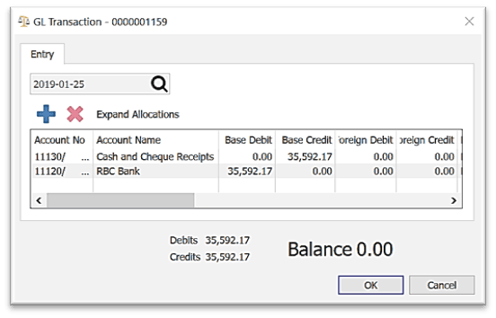
- Yes - a transaction will be presented to transfer the total payment amounts from the Cash and Cheque Receipts GL Account to the Bank GL Account and you will be prompted to print the Cheque Deposit List
-
-
-
-
-
-
-
-
-
- No - you can manually create the transaction later
-
-
-
-
.png?height=120&name=Gemini-Logic-Logo%20(1).png)

