Understand how to Adjust your Inventory Quantity level or Cost
![]() Adjust Quantity / Cost in one of 2 ways:
Adjust Quantity / Cost in one of 2 ways:
- Adjust through Inventory
- access
-
-
- Inventory List

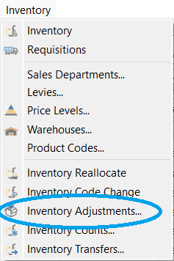
- Inventory Text Menu
- Inventory List
-

-
- select inventory item(s) from the list before clicking on Adjust
- or - browse for the inventory item(s) after clicking on Adjust

-
- enter Reference No of your choice
- enter the Date this adjustment will be posted
- option to establish the Location for all items (or choose separate Location in each line)
- system auto-generates an Adjustment No and Transaction No once you click on
 Post
Post
-
- enter the Receive Qty (enter negative to reduce On Hand quantity)
- if item is Serialized or Lot Numbered, a prompt will pop up, to assign (or un-assign if receiving a negative) Serial / Lot number(s):

- accept or change unit Cost
- identify the UOM you are receiving
- accept or change Sell 01 default selling price
- accept or change the G/L Account (Company & User settings permitting)
- accept or change Location
- accept or change Pack Size
- option to enter a line Reference / Memo
 Delete will clear the line selected
 check Serial / Lot Numbers that have been allocated to this receipt
 Scan Part / Serial / Lot Number barcode to input Inventory item
- use * as quantity multiplier - into the scan box, enter quantity then *, then scan barcode
- scan keyboard shortcut - ctrl + space
 Save /
  Save Close - items will be identified as on order in inventory, and can be later edited and / or posted through Inventory Text Menu > Inventory Adjustments
 Post will update the quantity on hand and post entry to the General Ledger (Company / User settings permitting)
- Once posted, the adjustment can be viewed through the Inventory text menu
- Adjust through Import
- Access - Tools > Import
- click on
 Open Config if you are accessing settings for a previously saved import configuration, or continue as follows:
- select the file Source location using the Browse Files… if this is an unsaved Import or Browse Folders… button if this is a previously saved Import, to load the .xlsx or .csv file created from scratch or amended from an inventory export
- select the Import Type - Inventory Adjustment
- under the Import File Field Value from your Excel spreadsheet, select the first field you want to map ie: ‘Warehouse’
- under Spire Field Name select the Spire field that matches the one just selected under File Field Name, ie: ‘Warehouse’
- click on Match and those two field names will drop to the bottom mapped section
- continue to map the fields you would like to populate the Inventory Adjustment utility
- option to select a Destination folder to move the successfully imported spreadsheet to
- option to select a Failure folder to move the unsuccessfully imported spreadsheet to
- identify if your spreadsheet
 Has Header Row
 - click on
 Save config /
  Save config as to save the Source, Import Type, Field Mapping, Destination and Failure folders into the current user’s documents folder
  Post Immediately or leave box unchecked to access the Adjustment after import to make any changes and Post after
 click on Import
- access the imported adjustment in the Inventory Text Menu to make any changes then

- Once posted, the newly imported adjustment(s) can still be viewed through the Inventory Text Menu

.png?height=120&name=Gemini-Logic-Logo%20(1).png)