Add a new Job Entry / Transaction
Add a Job Entry in one of 6 ways:
1. Job Costing module-
- access
- Job List -
 Job Entry
- Job List -
- access

-
-
- Job Details - Entries tab >
 Job Entry
- Job Details - Entries tab >
-
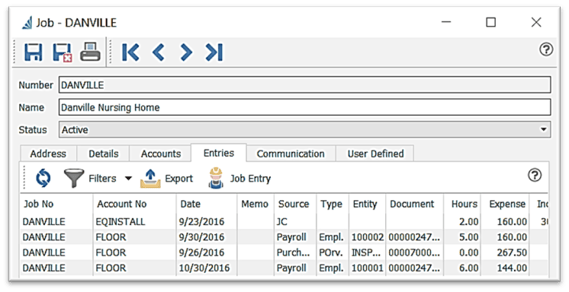
-
- click into the first grid line and type in or
 browse for the Job Account you want to post this Entry to
- click into the first grid line and type in or
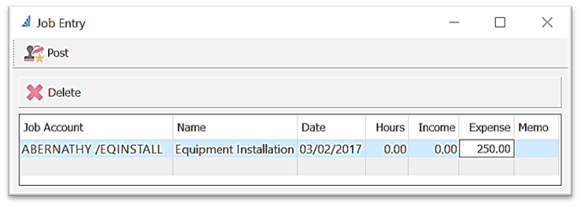
-
- enter Hours / Income / Expense / Memo
- click into subsequent blank grid lines to create an additional lines in the entry
 Post
Post
-
 New transaction
- click on the Job tab


-
- click into the first grid line and type in or
 browse for the Job Account you want to post this Entry to
 - option to enter Hours / Income / Expense / Memo
- click into subsequent blank grid lines to create additional lines in the entry
 Post or
  Post and Review GL
- User Settings for this selection - Edit > User Settings > Purchases
 Modify GL Transaction
- Modify Transactions by Default:
- User Settings for this selection - Edit > User Settings > Purchases
- click into the first grid line and type in or
-
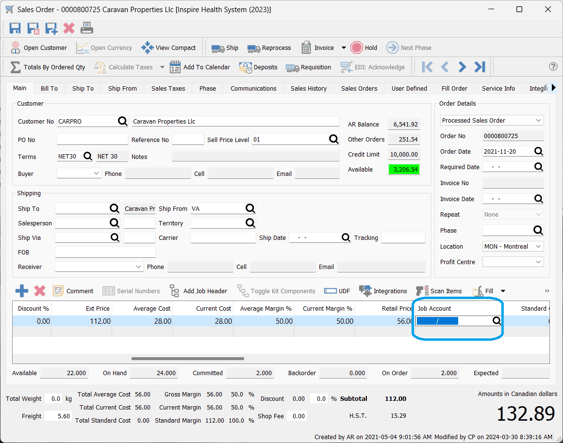
- a) track the expense / revenue for each line to a different Job Account
-
-
- open the order you want to enter the Job Costing allocation for
- scroll the Order Details section to the right until you see the column Job Account
- type in or
 Browse for the desired Job Account
 - repeat this process for each line
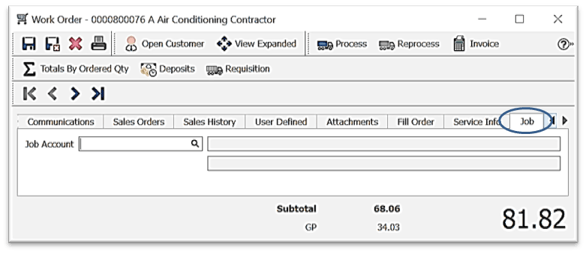
- b) track the entire order to one Job Account
-
-
- open the order you want enter the Job Costing allocation for
 scroll to the Job tab
- type in or
 browse for the desired Job Account
4. Payroll Timecard Batch
-
- in the pay line at the right end select Job Account with option to enter a Comment

5. General Ledger Transaction
-
- in the GL Transaction scroll over to the Job Account column on the line you wish to allocate to a Job Account
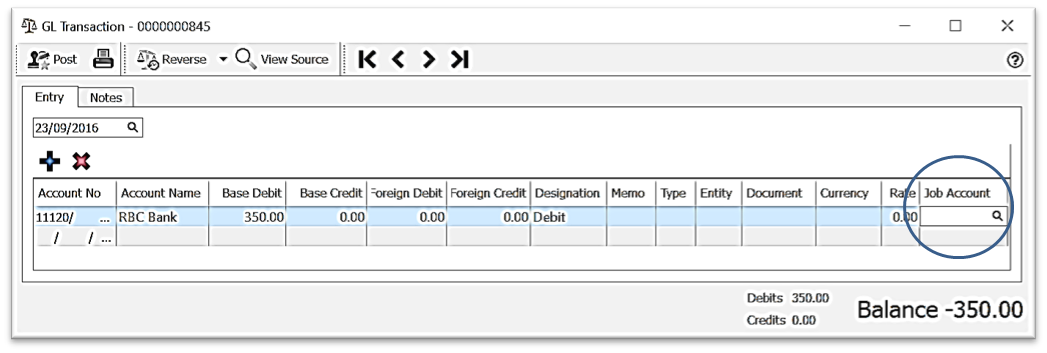
- type in or
 Browse for the desired Job Account to allocate the Debit / Credit from that line
- in the GL Transaction scroll over to the Job Account column on the line you wish to allocate to a Job Account
6. Import Job Entry

-
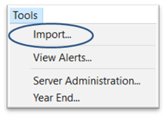
- Access - Tools > Import
-
- option to
 open a previously saved import configuration (mapping) or continue as follows:
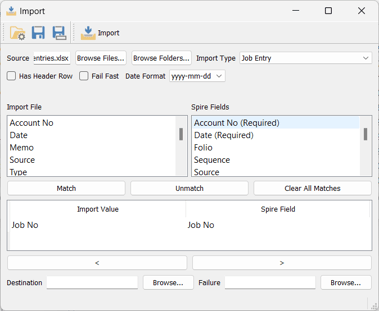
 - select the .xlsx or .csv file location Source using the Browse Files if this is a new import or Browse Folders button if this is a previously saved Import
- accept or change Date Format
- select from the Import Type list - Job Entry
- map fields:
- select the field under Import File Field Value - ie: Job No
- select the Spire Field Name that is the same - ie: Job No
- click the Match button
- continue to Match all fields you want to import into Spire (matched items will transfer down to lower section, where you can then select the field and Unmatch if desired)
- option to select a Destination folder to move the successfully imported spreadsheet to
- option to select a Failure folder to move the unsuccessfully imported spreadsheet to
- identify if your spreadsheet
 Has Header Row
 - click on
 Save config or
  Save config as to save the Source, Import Ty[e, Field Mapping, Destination and Failure folders
 - click on
 Import to finish and review the newly imported records
- option to
.png?height=120&name=Gemini-Logic-Logo%20(1).png)

