PAYROLL - Employee List Access / Functionality

- Access
- Module List > Employees tab

- Employee List Functionality
 Refresh to load any Employees that may have been posted by another user since last refresh and that may not be displaying on this list
-
 Filters - create a filter for this list
- click
 Filters
- choose Any or All selector

-
-
- select from the list of fields to set the criteria - ie ‘Payroll Date’
- select from operators ie: ‘is’, ‘is not’, etc - this operator list changes based on the field selected in the previous step
- enter the criteria information (ie: dates)
- if desired click
 to add a line of criteria
- to remove the criteria line, click

- make any column adjustments (see Column Customization)
- select
 Filters
  for save options
-
-
-
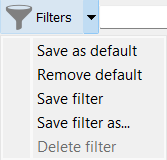
- Save as default - this filter will be active whenever viewing Employees / Timecards
- Remove default to remove the previously set default Filter
- Save filter to save changes on a previously saved Filter
- Save filter as… will allow you to name the Filter with the following settings:

-
-
-
-
- select
 User if this filter will be used by you only
- select
 Company if it is to be accessed by all users
 Show in module list to display beneath the module name

-
-
-
-
 Save column state if you have removed or added columns, or have sorted the list by one of the columns
- click OK
- the new Filter is also accessible in the Filter menu:

-
-
- click on the Filters button to release the current filter to see entire list or start new filter
- Icon Menu Customization
- hover over the Icon Group handle
 until you see
- drag the Icon Group to where you want it
- Column Customization
-
-
- drag and drop columns for desired positioning
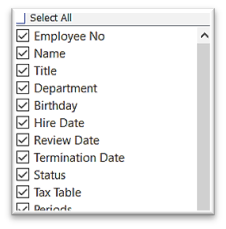
- right-click on any column heading to list to identify which columns you wish to see in the grid
-
 Column Sort / Search - click on any column heading to sort the list by that column
- further narrow your search by just typing (you will see the typed letters turn green) and the list will highlight the closest match, in currently sorted column

-
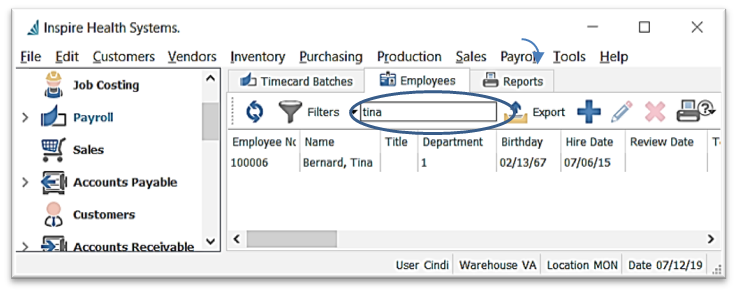
 - type any character(s) into the field and the list will narrow to only records containing the character(s) typed, somewhere in the details
- open an Employee record and use the Navigate buttons
 to page through Employees in the list, filtered or not filtered, in order of the current column sort
-
-
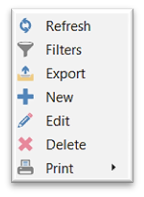
- Employee List Context Menu - right-click on any line to display
 Export Employees in your filtered or un-filtered list in Excel or CSV type
-
- will export all Employees visible, with the current column layout and sort order
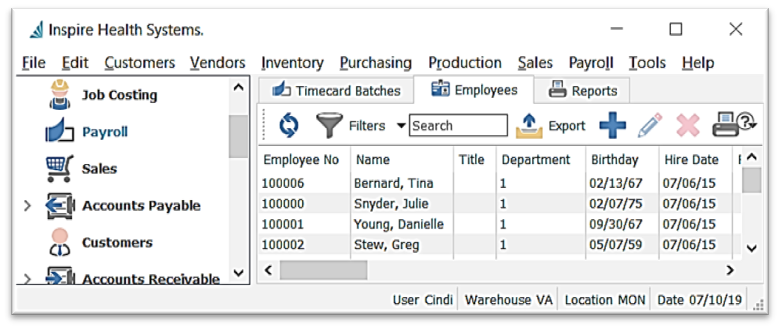
- click
 Export
- choose the location File name, and Type (.xlsx or .csv only) it is to be saved in
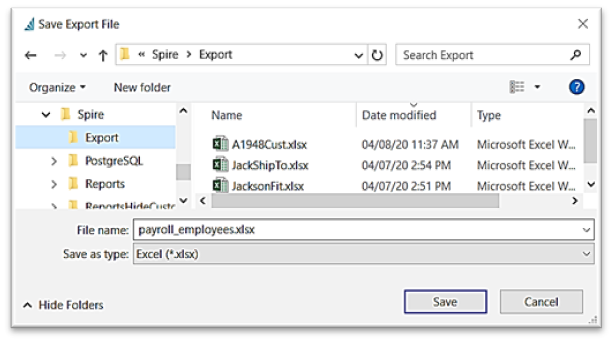
- Save
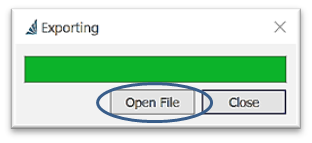
- option to Open File right away
- from excel, make any changes or build any desired formulas
 Add New Employee
 Edit Employee
- from the Employee List window scroll to select Employee(s) or use the Search or Filters functions
- click
 Edit - or - double click Employee line(s)
- make necessary changes
 Save or
  Save and Close or
  Save and Create New
-
 Delete Employee
- select Employee(s) from list and click
 Delete
 Print reports on the selected lines from the filtered or unfiltered list
  Email the selected Employee(s)
-
-
-
- Recipients
- click into the To box to select one or more from a list of detected email addresses - if you select ‘Employee-Spouse’, this report will be emailed to each selected Employee with a Contact assigned the ‘Spouse’ Type (manage Types in Edit > Company Settings > Company > Contact Types tab)
- alternatively, just type email address(es) in the To box

-
-
-
- select or type the CC and BCC recipient
- BCC can be set in User and Company settings - Email
- option to
 Select Template or setup a new one:
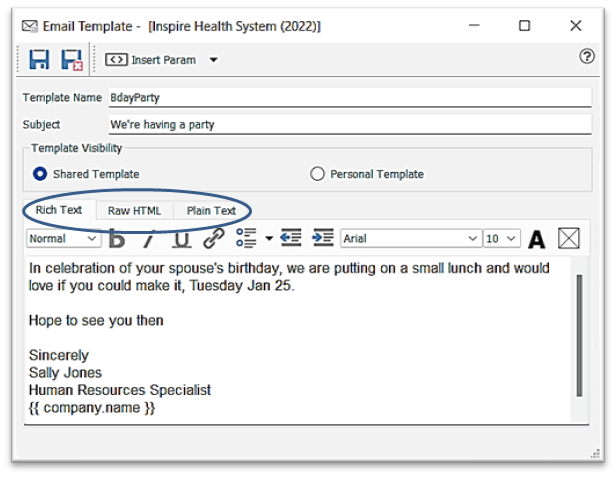
- Edit > Email templates
-
 New template
- enter Template Name
- enter Subject for the email
- enter the email message in the Body section, in the Rich Text tab if you want to use formatting (bullets, etc) or the Raw HTML tab if you want to add special formatting or insert an image, or the Plain Text tab if you want to avoid any formatting
- option to
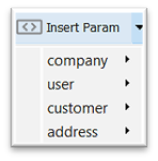
 Insert Param merge field(s) into the subject or message body
- option to make this a Shared Template (other Users can use it) or Personal Template
- if not using a template, then manually enter the Subject and Message, selecting either Rich Text, Raw HTML, or Plain Text tab
- accept or change the From email address
-
 Attach Report if you want to attach one or more additional reports to the email
-
 Attached File of any type
 Insert Param merge field( s) available for the records selected
-
-
-
 Open Related to open the record (Employee-if only one was selected) this email was generated from
 Send the email or
  Save /
  Save Close and View / Edit / Send later from the
  Email module or Employee Communications tab


 to add a line of criteria
 Filters
  for save options

 User if this filter will be used by you only
 Company if it is to be accessed by all users
 Show in module list to display beneath the module name
 Save column state if you have removed or added columns, or have sorted the list by one of the columns

 Column Sort / Search - click on any column heading to sort the list by that column

 - type any character(s) into the field and the list will narrow to only records containing the character(s) typed, somewhere in the details
 to page through Employees in the list, filtered or not filtered, in order of the current column sort
 Export Employees in your filtered or un-filtered list in Excel or CSV type
 Export

 Add New Employee
 New
New
 Edit Employee
 Edit - or - double click Employee line(s)
 Save or
  Save and Close or
  Save and Create New
 Delete Employee
 Delete
  Print reports on the selected lines from the filtered or unfiltered list
  Email the selected Employee(s)

 Select Template or setup a new one:
 New template
 Insert Param merge field(s) into the subject or message body
 Attach Report if you want to attach one or more additional reports to the email
 Attached File of any type
 Insert Param merge field( s) available for the records selected
 Open Related to open the record (Employee-if only one was selected) this email was generated from
 Send the email or
  Save /
  Save Close and View / Edit / Send later from the
  Email module or Employee Communications tab
 .png?height=120&name=Gemini-Logic-Logo%20(1).png)