Add new Timecards manually or through Import
enter a new Timecard / Timecard Batch in one of the 2 following ways:
- Enter Manually
-
- enter or
 browse for the Payroll Date
 - select from the
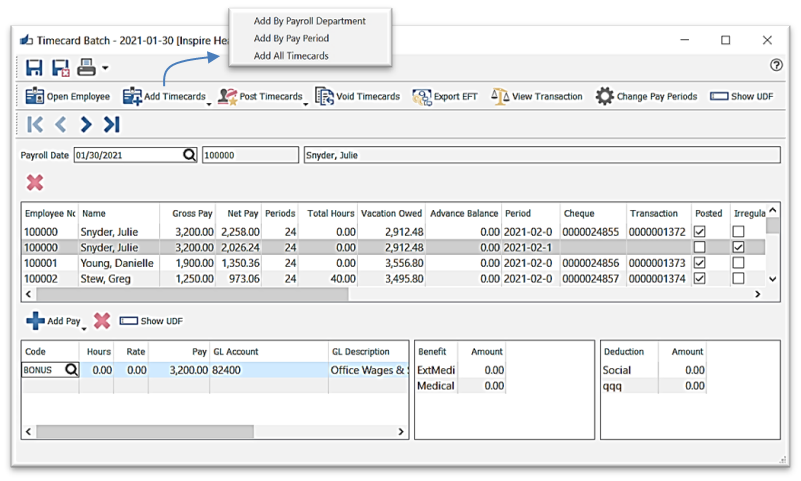
 Add Timecards options:
- Add by Payroll Department
- Add by Pay Frequency
- Add All Timecards
- enter or
-
- once you load the Employee(s), select the Employee and click
 Add Pay to access Employee’s Timecard Entry Codes list:
- once you load the Employee(s), select the Employee and click

-
-
- or
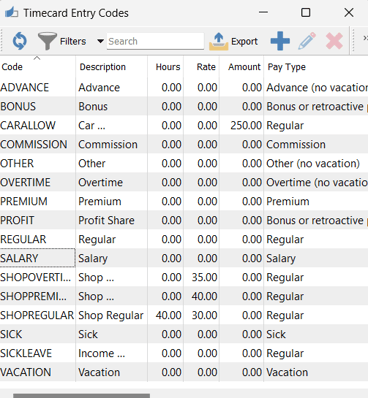
 browse for the full Timecard Entry Code list:
- or
-
-
-
- *note* the Bonus Code annualizes the total earnings over the balance of the year, and does not tax as if the Employee gets that amount on for each pay
-
-
-
- setup Timecard Entry Codes here in the list to
 Add /
Add /  Edit /
  Delete or access in the Payroll text menu:
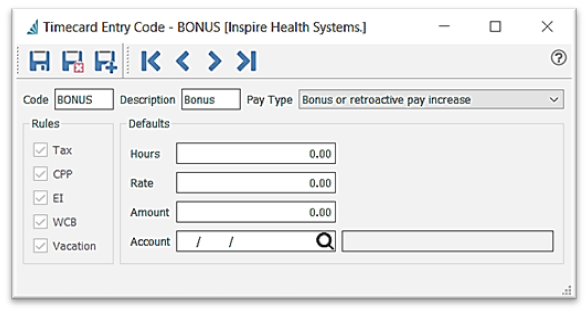
- enter the Code and Description
- select the Pay Type to determine calculation Rules for calculations or select blank to set your own calculation Rules
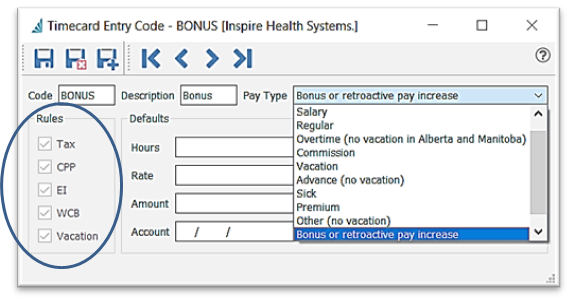
- enter Defaults if you want to establish associated Hours / Rate / Amount
- set the GL Account if different from the Salary Account established in Payroll text menu > Payroll Departments > Accounts tab
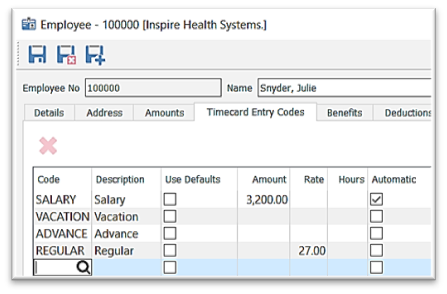
- Employee - set with option to Use Defaults as established in Timecard Entry Code setup or enter the Amount / Rate / Hours specific to this Employee
- check Automatic if the Entry Code is to be automatically added to each Timecard (can be changed at that time)
- set Payroll Department defaults in Payroll text menu > Payroll Departments to use Timecard Entry Code defaults or to establish Department-specific Amount / Rate / Hours and whether it will be an Automatic load into the Employee’s Timecard:
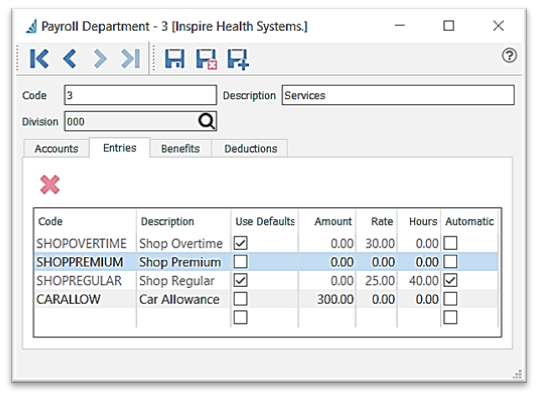
- set Payroll Department defaults in Payroll text menu > Payroll Departments to use Timecard Entry Code defaults or to establish Department-specific Amount / Rate / Hours and whether it will be an Automatic load into the Employee’s Timecard:
- setup Timecard Entry Codes here in the list to
- enter the number of Hours if applicable

- accept or change the Hourly Rate or Salary Pay, defaults for which are established in Employee > Amounts tab > Payments (more than one Code is permitted)
- accept or change the default G/L Account, as established in Edit > Company Settings > Payroll > Accounts tab, for Payroll Department selected (User settings permitting)
- option to enter a Job Account
- option to enter a Comment
- accept or change the amounts for Company Benefits and Deductions (see Payroll Departments)
-
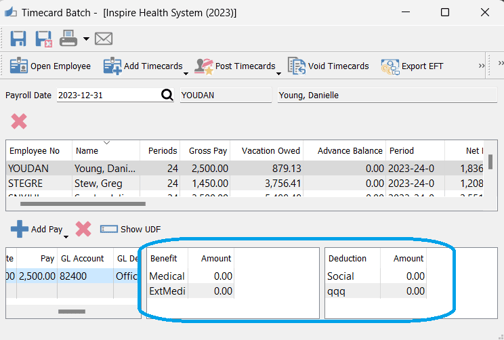
- accept or change CRA deduction calculations:

- note the CPP2 calculation - beginning January 1, 2024, you must deduct the second additional CPP contributions (CPP2) on earnings above the annual maximum pensionable earnings using the following rates and maximums.
Learn more: What is the CPP enhancement.
- note the CPP2 calculation - beginning January 1, 2024, you must deduct the second additional CPP contributions (CPP2) on earnings above the annual maximum pensionable earnings using the following rates and maximums.
2. Import Timecard Batch from Excel
-
- ensure your Excel spreadsheet has these columns

-
- Spire Access - Tools > Import
- option to
 open a previously saved import configuration (file / mapping) or proceed as follows:
 - select the .xlsx or .csv Source file location using the Browse Files… if this is an unsaved Import or Browse Folders… button if this is a previously saved Import

- accept or change Date Format
- select the Import Type (data) you are importing - Timecard
- map fields:
- select the field under Import File Field Value (ie: ‘Pay Date’ from Excel)
- select the Spire Field Name that is the same (ie: ‘Pay Date’)
- click the Match button
- continue to Match all fields you want to import into Spire (matched fields will transfer down to lower section, where you can then select the field and Unmatch if desired
- determine whether your spreadsheet
 Has Header Row or not
 - option to select a Destination folder to move the successful imported file to
- option to select a Failure folder to move the unsuccessfully imported file to
- click on
 Save config /
  Save config as to save the Source, Import Type, Field Mapping, Destination and Failure folders
 - click on
 Import to finish and review the newly imported records in Spire
.png?height=120&name=Gemini-Logic-Logo%20(1).png)
