AP Payments can be processed manually, or by batch for Cheques / EFT (Electronic Funds Transfer)

- Manual Payment entry
-
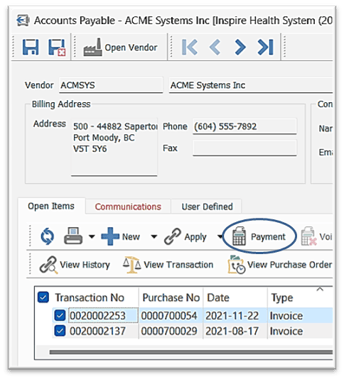
- open the AP Account you want to issue a cheque for
 flag the transactions you want to pay
-
- click on
 Payment
- click on
-
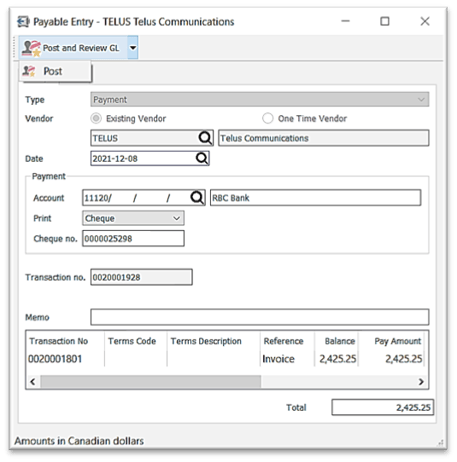
- accept or change the Date
- accept or change (User Settings permitting) the Payment GL Account this check will be drawn from
- select the Print option

-
-
- blank (ie: EFT, wire transfer)
- Cheque - accept or change the Cheque No
- Remittance - will not consume a Cheque number
- accept or change (User Settings permitting) the Payment account this cheque will be drawn from
-
-
- option to enter a Memo for internal reference
- option to enter / change the Discount Amount or Discount % then check
 Take Discount
 - accept or change the Total cheque amount - if changed, shortage will be applied to last transaction, unless the Pay Amount is changed for each transaction
- to print cheque, select from
 Post or
  Post and Review GL (or Alt+s)
-
-
- User Settings for this selection - Edit > User Settings > Accounts Payable
- Modify GL Transaction
- Modify Transactions by Default
- User Settings for this selection - Edit > User Settings > Accounts Payable
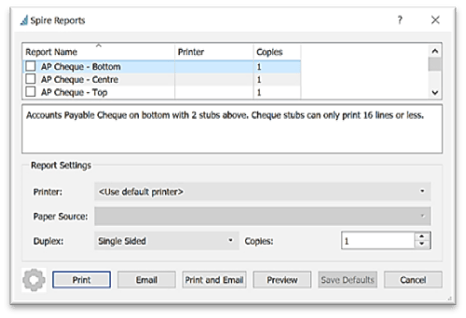
- from Spire Reports dialogue box, select the cheque(s) then select Print -or- Preview, then print from the Preview
-
-
- Select Continue to print attachments if the details on any cheque stub contains too many lines (establish this value in Edit > Company Settings > Accounts Payable > Cheque Detail Limit)

 Batch Payment by Cheque
-
- select Payables to pay in one of 2 ways:
- 1. from the Accounts Payable list (filtered or unfiltered), select the accounts you want to pay
- select Payables to pay in one of 2 ways:
-
-
-
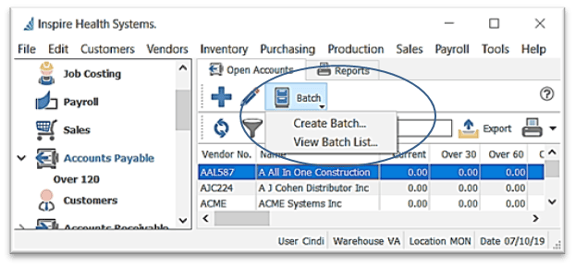
- click
 Create Batch (will only load payable accounts you selected, that are not currently loaded in other batches)
- click
-
-
-
-
- 2. without selecting any AP Accounts, click
 Create Batch and establish selection parameters:
- 2. without selecting any AP Accounts, click
-
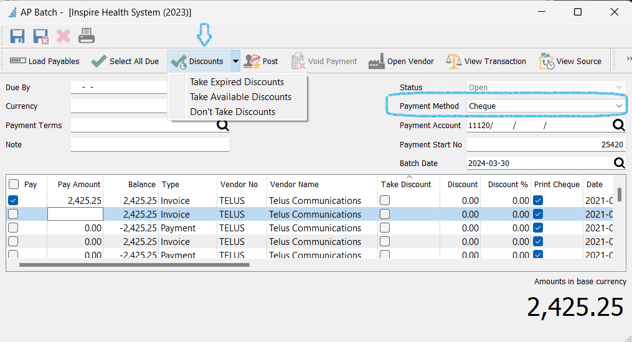
-
-
-
- Due By date
- Currency (leave blank for home currency)
- Payment Terms (leave blank for all)
- Payment Account (bank)
- click
 Load Payables (any invoices in red are due to be paid)
-
-
-
-
-
-
- select Cheque Payment Method
- option to enter a Note for this AP Batch
- accept or change Starting Cheque No
-
-
-
-
- enter the Batch Date to be assigned to cheques and transactions
- option to
 Select All Due based on Due Date listed -or- click into
  Pay to select all -or- click into each line
  to flag individually
-
-
-
 Discounts options - if the Vendor has discount terms set up in their details (see Vendors), the discount amounts will be presented in the Discount column, whether they are expired or still valid
-
-
-
-
- Take Expired Discounts - will take both valid and expired discounts off amounts payable
- Take Available Discounts - will take only valid discounts off amounts payable
- Don’t Take Discounts - will pay full invoice value on all transactions
- alternatively, you can cheque
 Take Discount for individual transactions and enter discount amount or percentage
 Open Vendor for selected item to view / edit Vendor details
 View Transaction (user access permitting) to see how this invoice was posted to the General Ledger
 View Purchase Order for selected item (if the invoice is resulting from a Purchase Order)
 Save or
  Save Close to access / edit at a later time
 Delete will delete the entire Batch
- option to
 Print Pending Payments report
  Post (or Alt+s) to print and post cheques to each Vendor’s account (transactions will be grouped onto one cheque per Vendor)
-
-
-
-
-
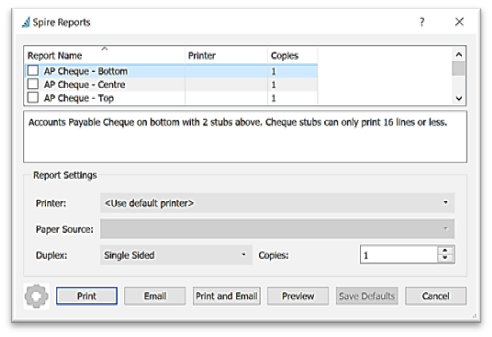
- in the Spire Reports print dialogue box
-
-
-
-
-
-
- select
 AP Cheque and / or any other reports or forms associated with this process
- select
-
-
-
-
-
-
-
- select Printer
- depending on your printer, you may have access to Duplex options
- option to Save Defaults for the form / report selected (for current user)
- click Print / Email / Print and Email / Preview
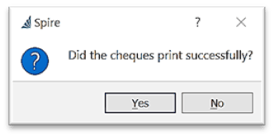
- Did the cheques print successfully?
-
-
-
-
-
-
-
- Yes - system will continue to process the batch
- No - the Spire Reports print dialogue box will pop up again to select cheque to print
- select Continue to print attachments if the details on any cheque stub contains too many lines
-
-
-

-
-
-
-
- establish the Cheque Detail Limit in Edit > Company Settings > Accounts Payable
-
-
-
-
 Batch Payment by EFT (Electronic Funds Transfer)
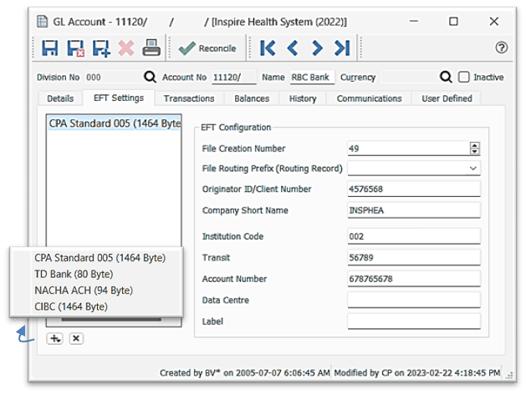
- Setup
-
-
-
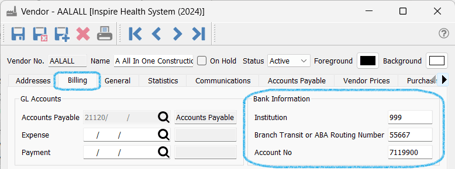
- enter the Vendor’s bank information
-
-
-
-
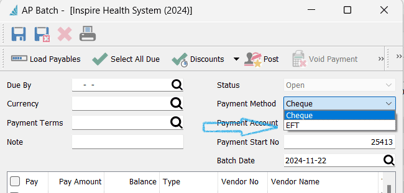
- continue as described above except you will choose the EFT Payment Method
-
-
-
 Post (or Alt+s) to post the Payments to each Vendor’s account (transactions will be grouped onto one cheque per Vendor)
- you will be prompted to Select EFT Settings
-

-
-
-
- confirm or change the GL Account you want to post this batch to
- select from that GL Account's established EFT Settings
- confirm or change the Process on date for the bank transaction
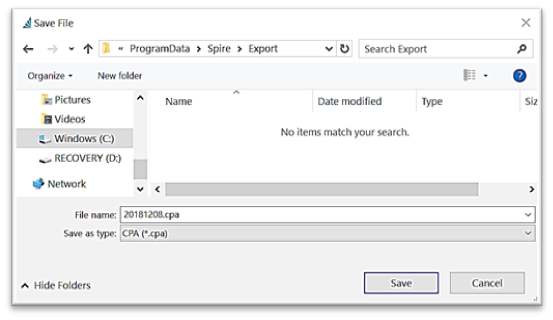
- you will then be prompted for the Save File location for the file you can send to the bank
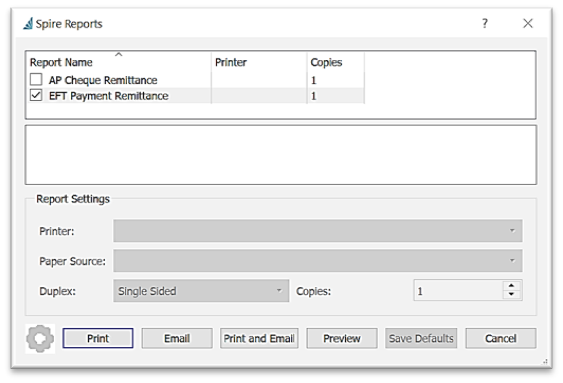
- you will then be prompted to print the EFT Payment Remittance report and/or AP Cheque Remittance:
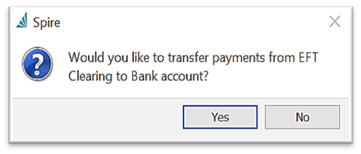
- a prompt will popup with option to transfer payments from EFT GL Account to Bank GL Account
-
-
-
-
- Yes - a transaction will be presented to transfer the total payment amounts from the EFT Payment GL Account to the Bank GL Account
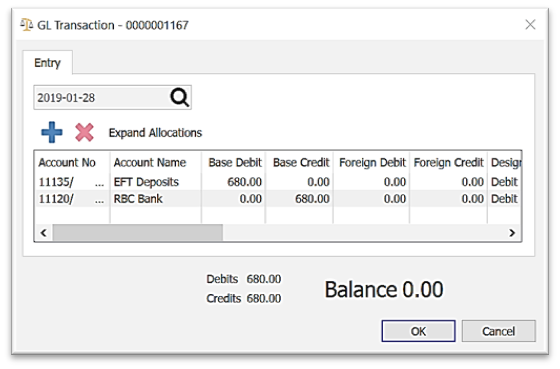
- No - you can manually create the transaction later
- Yes - a transaction will be presented to transfer the total payment amounts from the EFT Payment GL Account to the Bank GL Account
-
-
 Payment / Invoice to One Time Vendor
- Access -
 AP List
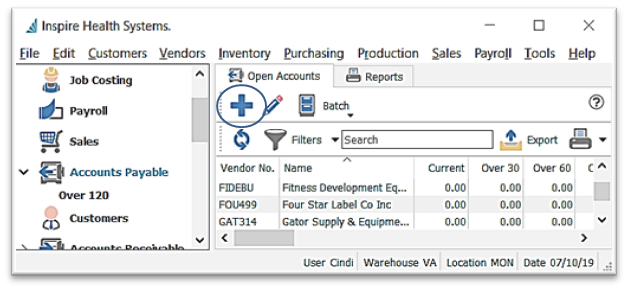
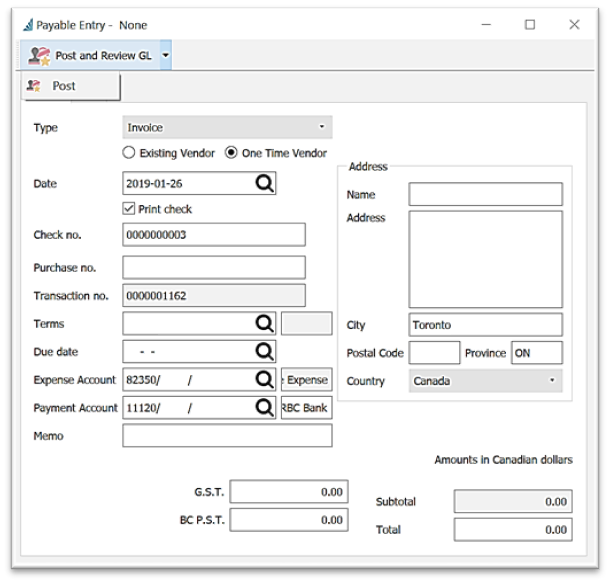
- leave Type as Invoice
- accept or change Date
- accept or change Payment no. (User settings permitting)
 Print cheque option (remove checkmark if it’s an EFT or debit or credit pmt)
- optional Reference no.
- option to refer this transaction to a Purchase no.
- option to assign Terms / Due date for this transaction
- identify Expense Account and Payment Account (bank )
- enter a Memo to print out on the cheque stub
- enter Name and Address information that is to print on the cheque
- enter Total with option to change tax amounts
- to post cheque and invoice, and to print cheque select select from
 Post or
  Post and Review GL (or Alt+s)
- User Settings for this selection - Edit > User Settings > Accounts Receivable > Modify GL Transaction / Modify Transactions by Default
- Access -
.png?height=120&name=Gemini-Logic-Logo%20(1).png)

