Document or schedule or attach a Communication / Note / Alert on a record or event for this Inventory item


- red lettering indicates there is a Communication present
 Refresh to load any Communication / Attachment that may have been added since last refresh and that may not be displaying on this list
-
 Communications List Filters / Search / Customization - see Inventory List Customization
  Export selected Communications in .xlsx or .csv format - see Inventory - Export
-
 New Communication / Attachment for this Inventory item
- option to
 Insert Date/Time into the message body
  Add Attachment(s) of any file type which will copy the file to C:\ProgramData\Spire\media
- to centralize these files, there is the option to Migrate them onto the Spire Server in C:\ProgramData\Spire\media\(database name)
- Tools > Migrate Files:
- to centralize these files, there is the option to Migrate them onto the Spire Server in C:\ProgramData\Spire\media\(database name)
- option to


-
-
 Add Link for a URL or file not in the centralized location mentioned above
 Open Related (in this case, the Inventory record)
 Mark Completed to insert the current logon date in the Completed Date field so this alert no longer pops up
- enter Subject
- option to select a Type from a preset list or add a
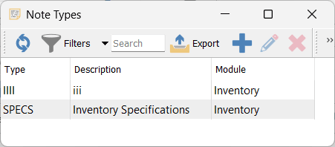
 New one on-the-fly from the browse list:
-

-
-
- option to enter an expanded message in the body
- Assigned To any user in the system
- Due Date (triggered by system date, not logon date) - schedule the message to:
- pop up at the Assigned User’s logon:
-

-
-
-
-
- view all scheduled Alerts in Tools > View Notes Due Today
- display a yellow banner when this Inventory record is opened
-
-
-

-
-
-
- display on the Assigned User’s Calendar, where the Communication can be viewed and accessed, with view options:
-
-

-
-
-
-
- Show Modules to select which Modules you wish to see Communications for, based on which Modules your User Settings allow
- Show Users to select which User’s entries you wish to see in your Calendar - activate in User setting View All Calendars (each User’s entries will be a different colour)

 Show Unassigned to also see entries not assigned to any User (Unassigned entries will be black)
 Show Completed to display all Calendar entries marked as Completed
- Number - option to sequence the communication for sorting in Filters and Reports
- Completed Date - enter any date here to stop notification
-
 Print - select which Sales or Purchase Order form the message is to print on from the Where drop-down list
-
-
-


-
-
-
-
 Alert will cause:
- a red banner to display when this Inventory record is opened
-
-
-

-
-
-
-
- activate a pop-up message when the Inventory item is used in a Sales or Purchase Order:
-
-
-

-
-
-
-
 Save or
  Save and Close or
  Save and Create New
-
-
-
-
- the Communication will also display in the Communications module where you have access to the following:

-
-
 Mark Completed to insert the current logon date in the Completed Date field so the alert no longer pops up for the selected Communication(s)
-
-
-
 Open Related (in this case, the Inventory record)
-
-
-
 Edit /
  Delete the selected Communication(s)
-
 Print reports (see Reports) on the selected Communication(s)
 - right-click to access the Context Menu:
-

Note that the colour of the banner displayed indicates the ‘status’ of the note:
- Yellow - a date has been entered
- Red - ‘Alert’ has been checked
- Blue - no date has been entered, and ‘Alert' has not been checked
.png?height=120&name=Gemini-Logic-Logo%20(1).png)