Use this utility to capture the difference between the expected quantities on hand and the actual counted quantities.
![]()
- establish User access settings - Edit > User Settings > Inventory > Add / Edit / Delete Inventory Count, View Count Variance & View On Hand (this last one allows the User to use the ‘Match Expected Quantities function described later)
- access
- Inventory list (to create a new Count only)

-
- Inventory text menu (to create a new Count or access previous Counts, posted or unposted)


-
-
- completed (Posted) counts have a Trans No and can be accessed but not changed
 Refresh to load any Inventory Counts that may have been added by other users but that may not be displaying yet on your list
 Inventory Count list customization - Filters / Sorts / Column changes - see Inventory List Customization
 Export Inventory Count List from a filtered or unfiltered list (see Filters) - will export all visual records in the current column layout and sort order
- choose the location File name, and type it is to be saved in
- Save
- option to Open File right away
-
 New Physical Inventory Count - it is important to make sure you don’t count inventory that has been received after the ‘Freeze’, and make sure you do count inventory committed on Sales Orders before the 'Freeze' but not invoiced.
- add Inventory items to a new Count Sheet in one of 3 ways:
- from your Inventory List, select the items you want to Count from your Inventory list and click
 Count
Count - from the Count list click
 New Count
- click
 Freeze Inventory
- select Inventory Items you want to include in this Count from a Filtered or un-Filtered list (see Filters)
 this gives you a chance to select by Product Code, or Warehouse Location, or any other product grouping, for cycle counts
 - click on Freeze All / Freeze Selected to load items into the Count Sheet
- click
- from the Inventory Count window
 Add or
  Delete items one at a time, with the option to select the Unit of Measure you wish to count (multiple UOMs may be entered into the Count Sheet for any item)
 Scan the Part / Serial / Lot Number barcode into the Count Sheet
- use * as quantity multiplier - into the scan box, enter quantity then *, then scan barcode
- keyboard shortcut - ctrl+space
- from your Inventory List, select the items you want to Count from your Inventory list and click
- add Inventory items to a new Count Sheet in one of 3 ways:
-
- once items are loaded into the Inventory Count Sheet click
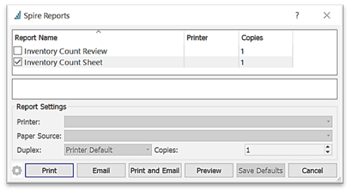
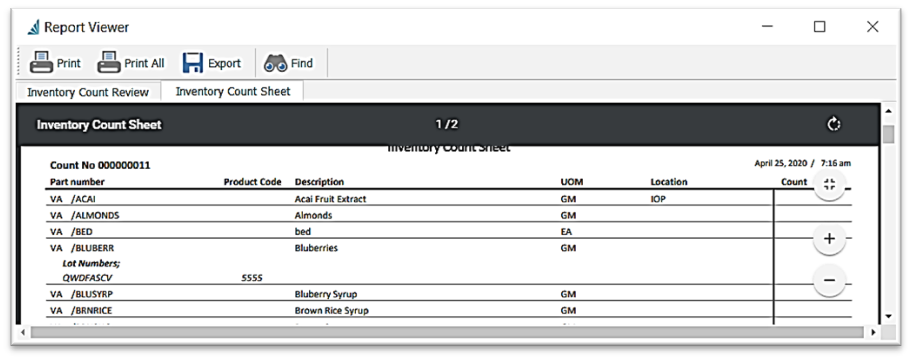
 Print and select the Inventory Count Sheet - note that the on-hand quantities are not printed and even though it is not recommended, you can have this report customized to print them
- once items are loaded into the Inventory Count Sheet click


-
- once the Inventory count sheet is filled, you can click
 Manual Count and enter your count quantities (unless you are scanning)
or - select Match Expected Quantity to fill the Stock Qty into the Counted Qty fields and change only counts that are wrong (user access permitting - Edit > User Settings > Inventory > View Count Variance) - click OK to load the quantities into the Inventory Count sheet
- once the Inventory count sheet is filled, you can click
- Serial / Lot Numbered items
- enter quantities in one of 2 ways:
 Scan the serial number label barcode and it will load the item, count of 1 per scan
- select the item with Serialized checked
- click on
 Count Serials
- from the Serial Number list popup, either Scan or enter Counted Qty beside Serial Numbers with Available Qty
- click on

-
-
- option to Show Closed to display historic (not in stock) Serial Numbers
-
- Users can continue to add Manual counts or scanned items to this or other Inventory Count Sheets from the list, and the quantities will continue to accumulate for all items, until the Count Sheet is
 posted
- in the example above, the items that have had multiple counts saved, are identified by a
 chevron…click on this to display the multiple counts and the User that created it
- in the example above, the items that have had multiple counts saved, are identified by a
- quantity differences are identified by coloured circles
 Green circle - Counted Qty matches Stock Qty
 Orange square - Counted Qty is different from the Stock Qty
 Red octagon - Counted Qty is zero and the Stock Qty is not
 Post Count
- once all counts are complete and correct, click
 Post to adjust Inventory quantities, and GL balance (if ‘Post Adjustments to GL’ is on in Company Settings)
-
- select from
 Post (to accept default GL posting) / Post and Review GL (or Alt+s) (to review or change the GL Accounts)
- User Settings for this selection - Edit > User Settings > Inventory
 Modify GL Transaction offers the drop-down option
 Modify Transactions by Default (on) presents the button like this:
 Modify Transactions by Default (off) presents the button like this:
- User Settings for this selection - Edit > User Settings > Inventory
- select from
- ***Note...if inventory is physically removed after a count process is started but before the item is counted, inaccuracies will result
-
.png?height=120&name=Gemini-Logic-Logo%20(1).png)