How to Receive Inventory Items on a Purchase Order
![]()
Receive Inventory Items on the Purchase Order on one of 2 ways:
1. Line Item Receiving
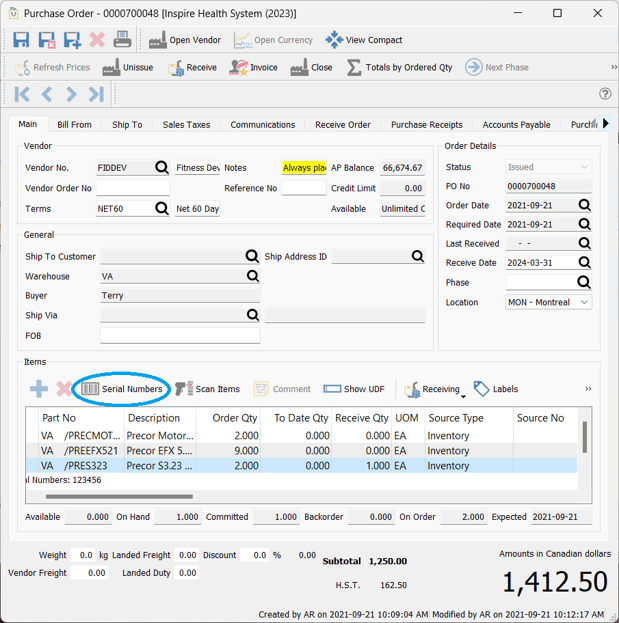
- receive All items on the Purchase Order using the Items Receiving menu -or- enter the Receive Qty into each line in the grid

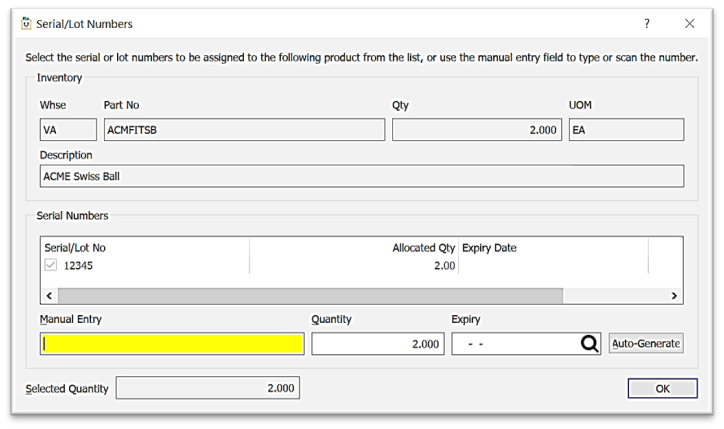
 Serial / Numbers - if prompted, enter the Serial / Lot Number(s) (see setup in Inventory - Serial Numbers tab)
- Manual Entry
- enter the Serial/Lot Number in the Manual Entry field
- enter Quantity (if this item is Lot Numbered)
- enter Expiry Date (if this item is Lot Numbered)
- press your tab key to load into the Serial / Lot No grid
- continue to enter for all Serial / Lot numbers being received
- click OK
- Auto-Generate if Serial Numbers are sequential
- enter the first Serial No for the sequence in the Manual Entry field
- click Auto-Generate to assign the Serial Numbers for the balance of the items
- option to view / re-assign the Serial / Lot Numbers on items just received in the current Purchase Order edit session:
- Manual Entry

- Landed Freight / Landed Duty enter in one of 2 ways:
-
- line-by-line percentage or dollar value, the totals for which will display in the Order footer

- enter the amount directly into the footer, to apply to all items being currently received
- line-by-line percentage or dollar value, the totals for which will display in the Order footer
-
- you will be prompted for costs distribution options:

- the Landed Freight and Landed Duty values can be saved for that Inventory item in order to load into subsequent Purchase Orders: Edit > Company Settings > Inventory > Save landed costs
- you will be prompted for costs distribution options:
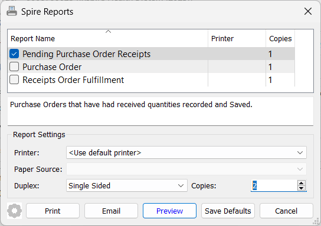
- option to review the Pending Purchase Order Receipts report, for receipts saved but not fully Received (
 Receive was not clicked in the PO Header yet)
- click
 in the PO Header and select the report:
- click


- click
 Receive in Purchase Order header to complete the Receive process and update inventory quantities and post values to the General Ledger
- User settings permitting, you will be presented with the option to Post GL transaction automatically Yes or No (No to change GL Accts)

2. Receive Order tab - receive goods with a scanner on an Issued Purchase Order here, as an alternative to receiving from the grid functions in the Main tab, as explained in 1.
-
- Scan the Part / Serial / Lot Number barcode to input receive qty of 1
- alternately, type a Quantity multiplier (see Company Settings > Inventory - Quantity Multiplier) into the scan box, enter quantity then your Quantity multiplier (ie: *), then scan barcode
- Scan the Part / Serial / Lot Number barcode to input receive qty of 1

-
- if you are receiving a serialized / lot numbered item you will be prompted to enter a serial / lot number for each item received (see Serial Numbers above)
 button will remove all quantities scan-received for the item selected
- Cost may be accepted or modified
- Extended Cost displays the unit Cost times the Order Qty
- option to change Sell 01 (default selling price)
- Location loads warehouse location from Inventory > General tab and may be modified
- Vendor Part No loads from the Inventory > Vendor Prices, and may be modified
-
- Column Customization - see Purchases List Column Customization
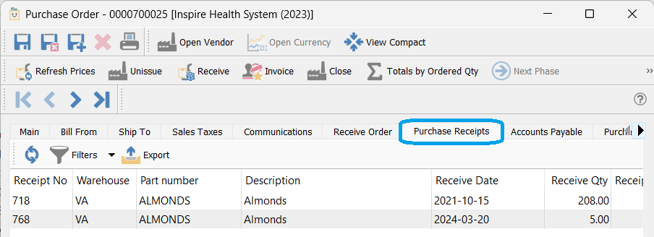
- Purchase Receipts tab displays everything received so far on this Purchase Order

-
 Refresh to load any receipts that may have been posted since last refresh and that may not be displaying on this list
-

 Receipts List Filters / Search / Customization - see Purchases List Customization
 View / Edit the Purchase Order in a new window
 Export the Purchase Receipts list to Excel
- Accounts Payable tab will display any Vendor Invoices posted so far, for items received on this Purchase Order (see Purchase Order Vendor Invoice)

.png?height=120&name=Gemini-Logic-Logo%20(1).png)