Spire integration settings for external software
Access - Tools > Server Administration


 Commerce EDI
- Setup - visit www.spscommerce.com for information on how to setup an account
- Configuration
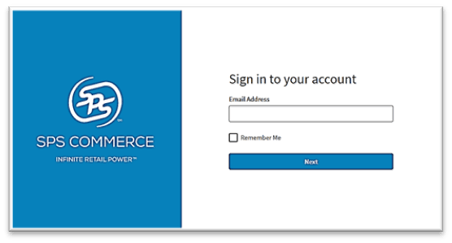
- click Connect
- sign into your account
-
- Manage Access to select which companies will use SPS

- Settings in Spire
-
- for more information on setup visit SendGrid at https://sendgrid.com/
SMTP
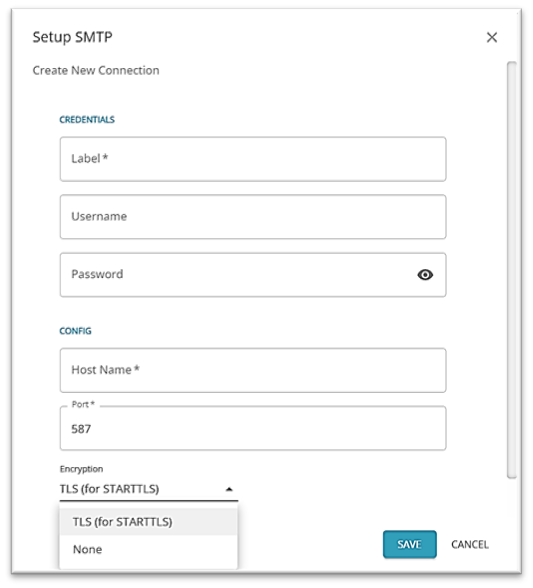
establish internal SMTP email settings here, to be used for all companies, rather than having to do so in Company Settings for each individual company
- click Setup to establish a new connection
- enter Credentials for your email account
- give this connection a Name (Label)
- enter email account Username / Password
- enter Config settings – Host Name / Port / Encryption options
- None - the company will use settings established within Spire - Edit > Company Settings > Email (see Company Settings - Email)
- enter Config settings – Host Name / Port / Encryption options
- Manage Access - select from existing companies to grant access for each ‘Label’ in this setup

![]() payment solution provider integrates with Spire to allow processing of credit card payments for ‘Card not present’ transactions
payment solution provider integrates with Spire to allow processing of credit card payments for ‘Card not present’ transactions
- contact Global Payments to set up an account
- Configuration in Server Administration

-
- enter the Label of choice
- enter the App Id and App Key provided by Global Payments
- option to
 Use sandbox environment if you are testing
 - click Save
- Manage access - select which companies should have access to this Global Payments account integration

- Settings in Spire - establish through Payment Methods
![]() payment solution provider integrates with Spire to allow terminal-based (physical device) credit card payments for ‘Card Present’ transactions
payment solution provider integrates with Spire to allow terminal-based (physical device) credit card payments for ‘Card Present’ transactions
- Account Setup - visit Payfacto.com for contact information in your area to set up your account
- Configuration in Server Administration
-
- click Setup
- enter the Company Label and your API Key (provided by PayFacto)

- enter your API Key provided by PayFacto
- select
 Use sandbox environment if you are testing
 - click Save
- Manage access - select which companies should have access to this Payfacto account

- Settings in Spire - establish through Payment Methods
![]() payment solution provider integrates with Spire to allow processing of credit card payments for ‘Card not present’ transactions
payment solution provider integrates with Spire to allow processing of credit card payments for ‘Card not present’ transactions
- Account Setup - visit payfirma.com/engage/spire-systems to contact Payfirma and setup an account
- Configuration
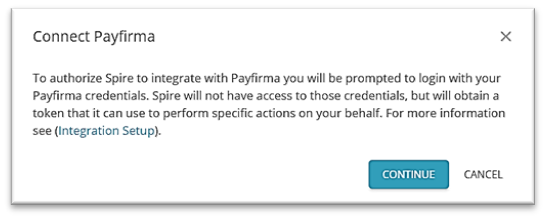
- Click Connect
-
- Click Continue
- Sign In to your account

-
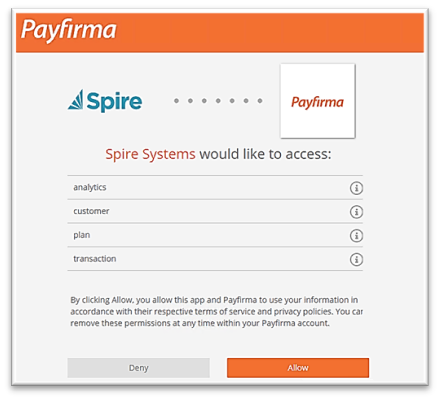
- Allow Spire to access Payfirma
- Manage Access
-
- Select which Company you wish to connect
- note - if you have multiple companies you wish to connect to your Payfirma account, you will need to repeat these steps for each one
- Select which Company you wish to connect
- Settings in Spire - establish through Payment Methods
- establish one or more Customer Credit Cards - not stored in Spire, but instead vaulted in a secure location within the Payment Processor portal (once saved, only the last 4 digits display)

-
 Sync Customer Details if your Customer address changes to upload those changes to the vaulted file
- Setup - contact Avalara to setup an account - https://www.avalara.com/us/en/products/integrations/spire.html
- Configuration
- enter your Account Number / License Key
- check Use sandbox environment if you are only testing

-
- click SAVE
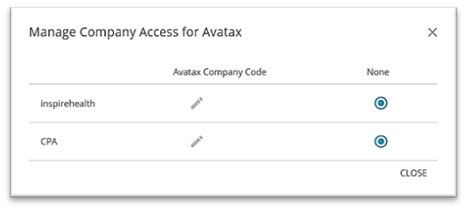
- Manage Access - set the Avatax Company Code for each of the companies you wish to activate / track Avatax for
- Settings in Spire
- Sales Taxes (in the Edit menu)

 establish a new tax for Avatax
- Sales Taxes (in the Edit menu)
-
-
- check
 Integrated sales tax provider
 - leave rate at zero because Avatax will do the calculations
- assign the Avatax GL Account (only one needed, as Avatax will provide all reporting information)
- check
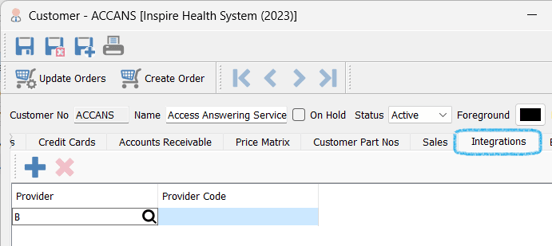
- Customers (see more in Customers - Integrations tab)
- Sales Taxes tab

- Provider Code (if this Customer is an exception to default tax settings)
- Sales Taxes tab
-
-
-
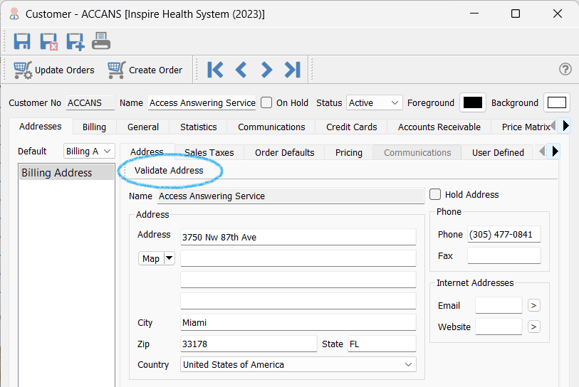
- Customer Address Validation - ensure this address complies with Avatax settings:
-
-
-
- Inventory
- Item-specific - if this item does not fall within the default tax classification (see more in Inventory - Integrations Tab)
- Inventory
-

-
-
-
- Product Code Item grouping if all items using this Product Code do not fall within default tax classification and have the same alternative Avatax Provider Code
-
-

-
-
-
- Levy tax classification (for Levy setup information see Inventory Levies):
-
-

-
-
-
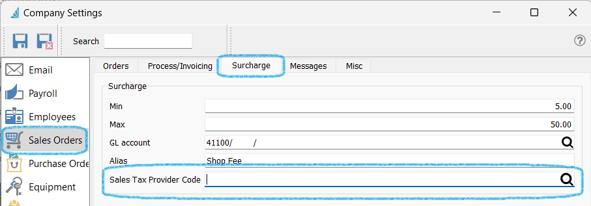
- Service Charges (Surcharges) tax classification:
-
-
-
-
-
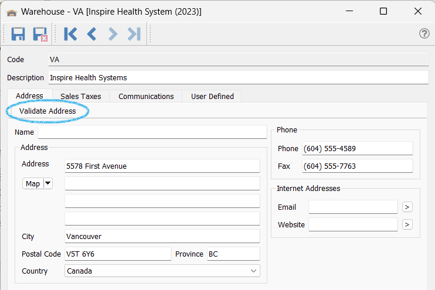
- Warehouse Address Validation - ensure this address complies with Avatax settings:
-
-
-
-
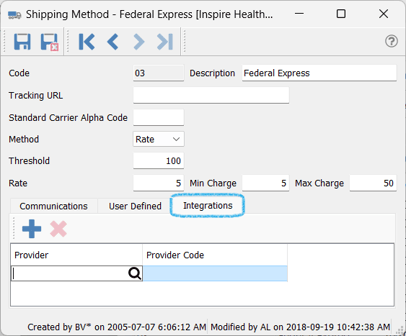
- Shipping Methods - Avalara sets a default tax classification for shipping for each jurisdiction. However depending on the type of shipping used the tax classification may be different. In many jurisdictions it is common for the tax rate to be different if the shipping is done via the vendors own truck.
-
-
-
- Transaction tracking / reporting - see YouTube video referenced here:
-
for more information on Avatax, see the Spire YouTube video https://www.youtube.com/watch?v=HaEJdOlVZ7o
- Setup
- ensure setup User has the following system settings in place
- Administrative install privileges
- Permission to install connectors
- Access to Spire Server Administration
- Spire Software Assurance must be paid up and current
- download / install Power BI Desktop from Microsoft at https://www.microsoft.com/en-ca/power-platform/products/power-bi/downloads
- click Advanced download options > Download:
- ensure setup User has the following system settings in place

-
-
- choose
 PBIDesktopSetup_x64.exe
 - click Download
- once download is complete, install the program
- choose
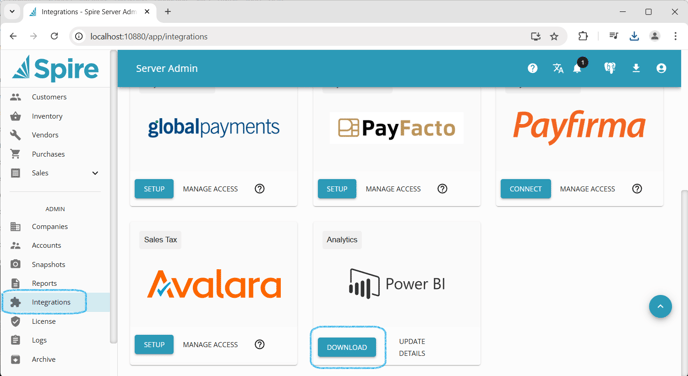
- Download the Spire Connector
- in Spire go to Server Administration (Tools > Server Administration)
- click on Integrations:
-
-
-
- click on Download
- install from downloaded file
- Connect Power BI to Spire data
- open the Power BI desktop app
- from the Home page select Get data from other sources
- type spire in the search box to locate the Spire Connector
-

-
-
- enter information on the data you wish to connect to
-

-
-
- click OK
- enter your Spire credentials and click Connect
-

.png?height=120&name=Gemini-Logic-Logo%20(1).png)
