For use in conjunction with cash registers, with adapted invoice printout format

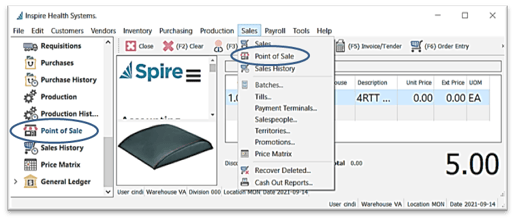
- Access
-
- Sales text menu
- Module List
- window display
- top half (in this example it's Spire's website) is established in Edit > Company Settings > Sales Orders > Misc tab > Home Page (this could be a group of photos, for a rolling display)
- bottom half displays the selected item's image as established in Inventory Details > Image tab

- New Sale
 Customer selection
- click
 (F3) to browse for Customer (option to set prompt in Edit > Company Settings > Sales Orders > Misc >
  Always prompt for customer)
 - or- create
 New Customer from the browse list
- click

-
- option to enter Customer PO
- accept or change the Salesperson and / or Territory
- enter the Order Discount (alternatively, discount can be assigned for each line, as described in the following section)
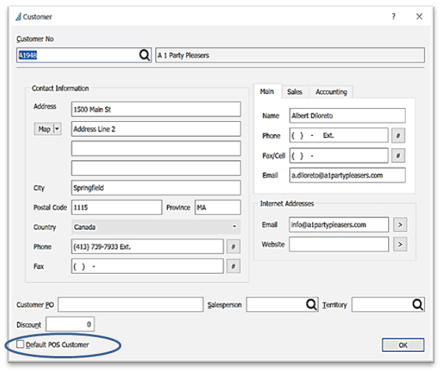
- option to set this Customer as the
 Default POS Customer so that Customer selection will no longer be necessary in Point Of Sale module:
-
- Item Selection - add an item to the Order in one of 4 ways:
- hit your Enter key
- click
 (F9) Inventory Lookup (or hit F9 on your keyboard) to select the part from the Inventory List
 - Scan the Part / Serial / Lot Number barcode to input Inventory item - use * as quantity multiplier - into the scan box, enter quantity then *, then scan barcode
- double-click on first line in the grid to browse for the inventory item in the Edit Item window
- Item Selection - add an item to the Order in one of 4 ways:
-
- type in the Part No and tab
- enter the Quantity (or leave as 1)
- or - continue to scan to top up the quantity
- behavior of scanned quantity is set in Edit > Company Settings > Sales Orders > Misc
- enter the Quantity (or leave as 1)
- type in the Part No and tab

-
-
-
 Accumulate Items on will add scanned product into one line
 Accumulate Items off will create a new line each time an item is scanned
-
-
-
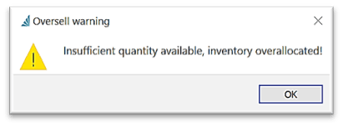
- option to activate or de-activate the Oversell warning message in User Settings > Sales Orders > Messages Tab >
 Display warning when POS overcommits inventory
- option to activate or de-activate the Oversell warning message in User Settings > Sales Orders > Messages Tab >
-
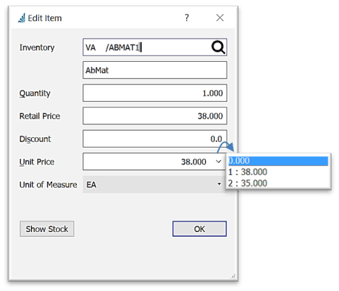
- confirm or change Retail Price (User Settings permitting)
- option to enter a Discount percentage for this line item
- Unit Price will display all price levels from Inventory > Prices and Units tab > Pricing > Sell Price list
-
- option to choose Unit Of Measure (UOM) if multiple Units of Measure are used on this item (see Inventory - Units of Measure)
- accept or change tax settings for this line item
- Show Stock button will display the Inventory Stock listing availability in all Warehouses it is stocked in
- Okay to complete input on this line
- insert a
 Comment - press F7 key
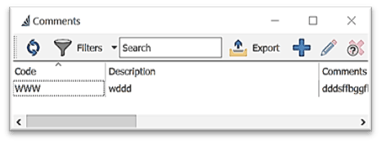
 browse for pre-set Comment where you can then add
  New comment on-the-fly from the browse list - or - just type the Comment in the box

 Edit order details or line item selected in one of 2 ways
- click on
 (F4) Edit Item or F4 key
- make allowable changes
- click on (F6) Order Entry or F6 key to open full Sales Order module
- make allowable changes (ie: Cust PO #)
- press F6 again to return to Point of Sale -or - complete and print full invoice from here
 Delete the Customer and all Items entered on the Order
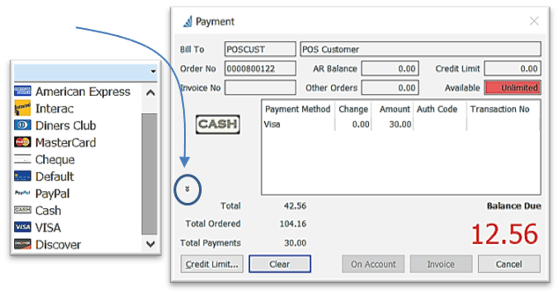
 (F5) Invoice / Tender
-
- select Payment Method - click the double chevron for more or type the Keyboard Shortcut (see Payment Method setup)
- confirm or change Amount (can be spread over multiple methods)
- if a ‘Credit’ Payment Type is selected, you will be prompted to enter Authorization Code if required
- On Account can only be selected if this Customer does not have zero credit limit; however, Credit Limit… can be changed here (User settings permitting)
- (F5) Invoice / Tender to complete Sale and print the receipt
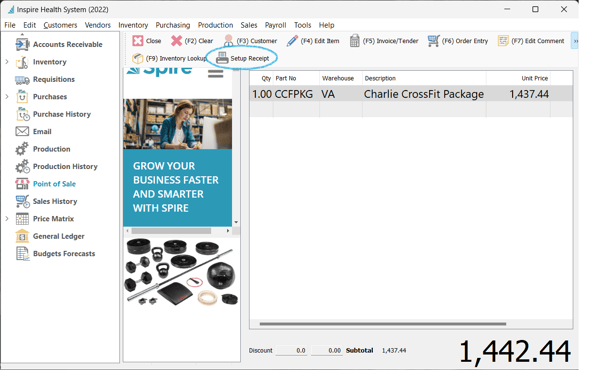
- establish printer and printer settings in Setup Receipt
-
-
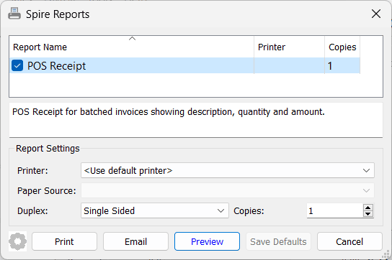
- highlight POS Receipt
-
-
-
- select print options below
- click on Save Defaults
- click Cancel
-
-
 (F9) Inventory Lookup to see details on the selected item
 Cash Out
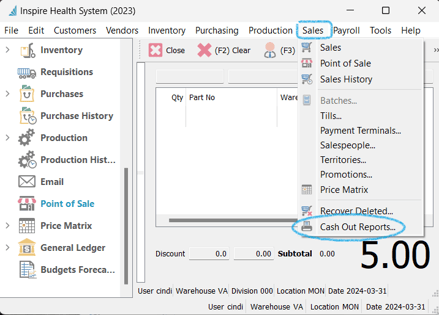
- Access - Sales Text Menu
-
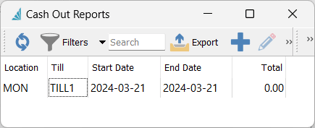
- Cash Out Report Worksheets will stay in this list until they are deleted
-
-
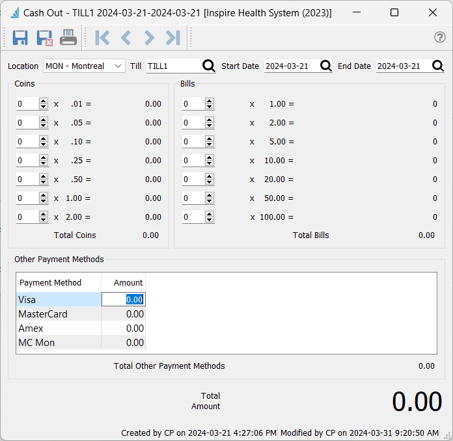
- select Location if you are using Location Accounting (see General Ledger Segmentation)
-
-
-
- select the Till ID
- enter Start Date and End Date of sales you want to balance to in this report
- enter all cash in drawer in Coins and Bills, which would include opening float
- enter amounts collected for Other Payment Methods listed
-
! Note - all number fields in Spire are calculating fields so you can type 200.00+34.00+1,000.00 and hit enter, to fill the field with 1234.00
-
-
- Print Cash Balance Report / Cash Balance Details Report
-
- Penny Rounding
-
- activate this utility in Edit > Company Settings > Sales Orders > Misc tab


- activate this utility in Edit > Company Settings > Sales Orders > Misc tab
-
- when tendering a cash payment, the invoice amount will be presented as Tendered and the rounded up amount will be presented as Payment
.png?height=120&name=Gemini-Logic-Logo%20(1).png)